

3D Silicone Heat Transfer Labels Exporter Guide to Durable Branding Solutions
2026-11-16
You can spot a cheap heat transfer label from across the room—it curls, cracks, or fades before the product ever reaches its second season. That's a branding failure you can't afford. 3D silicone heat transfer labels were designed to end that cycle, offering depth, flexibility, and wash-fastness that flat prints simply can't match. Yet the exporter you choose makes all the difference between a label that lasts and one that lets your brand down. This guide walks you through what to look for, what to avoid, and why Victorygen heat transfer label has become a reference point for brands that take durability seriously.
What Makes 3D Silicone Labels Survive Industrial Washing?
Industrial washing cycles are brutal—near-boiling water, harsh alkaline detergents, and constant mechanical abrasion. Flat printed labels fade or crack under these conditions, but 3D silicone labels take a different path. The silicone itself is a cross-linked elastomer; once cured, it doesn't soften in hot water or degrade in aggressive chemical baths. This molecular stability means the label keeps its shape, color, and flexibility after dozens of wash cycles.
Beyond material toughness, the way 3D silicone labels are attached matters just as much. They are typically heat-pressed onto the fabric under controlled pressure, allowing the silicone to bond directly with the textile fibers rather than sitting on the surface as a printed layer. That bond resists peeling even when the garment is twisted and spun at high speed. The raised 3D structure also distributes mechanical stress more evenly across the label, so corners don't lift the way they do with woven tags or screen-printed patches.
Color retention plays a role too. In industrial washing, bleaches and optical brighteners attack most printing inks, but the pigments in 3D silicone labels are encapsulated within the elastomer matrix. They are not exposed on the surface, so repeated chemical exposure doesn't wash them out. The result is a label that remains legible and intact long after conventional tags have disintegrated.
Matching Exporter Capabilities to Your Brand’s Texture Needs
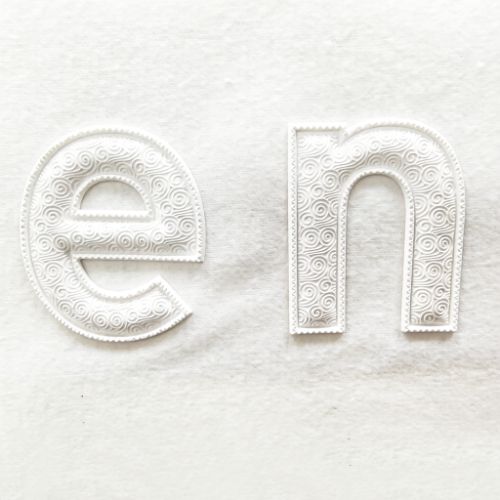
Texture is rarely a simple checkbox in your sourcing specs. It’s the silent handshake between your product promise and the consumer’s fingertips. When you’re vetting an exporter, you need more than a catalog of available surfaces — you need proof that their tooling, finishing lines, and quality checks can reproduce the exact grain depth, gloss level, or soft-touch feel your brand has already committed to in its design language.
Start by mapping your three toughest texture challenges: maybe it’s a low-sheen leatherette that shouldn’t fingerprint, or a coarse knit pattern that has to survive injection molding without drag marks. Then ask the exporter for their deviation history on similar runs. Not their best samples — their rework rates, their tolerance bands for roughness (Ra values), and how they handle batch-to-batch drift in matting agents. A capable partner will talk about edge cases: how they adjust mold temperature for finer hairlines, or why they reject a texture plate after a certain number of cycles.
Finally, look for an exporter who treats texture as a sensory system, not just a surface decoration. Can they suggest alternatives when your original spec drives unit cost too high? Do they store digital texture scans so your next order matches the first? That kind of depth is what separates a supplier who merely makes parts from one who protects the feel your customers expect every time they unbox your product.
How to Verify Durability Claims Without Visiting the Factory
Start by asking for third-party test reports from recognized labs like TÜV, SGS, or Intertek. These documents often reveal cycle counts, load ratings, and material fatigue data that marketing sheets conveniently leave out. If a supplier hesitates or sends only a one-page summary, treat that as a red flag—legitimate manufacturers typically keep full reports on file and share them without drama.
Next, request video evidence of specific stress tests, not just polished product walkthroughs. Ask for raw footage showing the item being dropped, twisted, or subjected to repeated use under controlled conditions. Pay attention to whether the same unit survives multiple rounds or gets swapped out between takes. A single continuous clip with a visible timestamp carries far more weight than a montage of dramatic slow-motion shots.
Finally, cross-check the warranty language against the claimed lifespan. If a chair is marketed to last 20,000 sit-stand cycles but the warranty covers only 12 months of normal use, the numbers don't align. Reach out to past buyers through industry forums or import records—real-world failure rates often surface in niche communities long before they appear in any official audit.
The Hidden Costs of Low-Price Silicone Label Quotes
A budget-friendly silicone label quote often looks like a clear win on paper, but the real story emerges weeks later when the first production run grinds to a halt. Those low numbers rarely account for precision die-cutting, consistent edge finishing, or color matching across batches. You end up with labels that peel at the corners, fade unevenly under UV exposure, or arrive with a surface texture that feels cheap against your product. Every rejected batch or customer complaint chips away at the initial savings until the true cost far surpasses a mid-range quote.
Then there's the hidden time tax. Cheaper suppliers often operate with longer lead times, minimal communication, and limited revision rounds. A simple tweak to your logo's spacing might trigger a new tooling fee or push delivery back by three weeks. If you're coordinating a product launch or seasonal packaging update, those delays force you to pay rush fees elsewhere, scramble logistics, or even miss shelf dates altogether. Suddenly the low price on the invoice is irrelevant compared to the revenue lost while waiting.
Finally, consider the durability gap that doesn't show up in a sample photo. Silicone labels are meant to survive washing machines, dryers, and daily wear, but low-cost versions often use lower-grade silicone that hardens, yellows, or loses adhesion after a few dozen cycles. You end up reordering twice as often, paying shipping and setup charges repeatedly, and managing customer returns—all while your brand reputation takes the hit. The honest math says a slightly higher upfront quote is almost always cheaper over a single production year.
Custom Mold Fees Explained for First-Time Buyers
When you order a custom mold for the first time, the price tag often includes several separate charges that aren't always obvious upfront. The mold base itself is usually the largest single cost—this is the machined steel or aluminum frame that holds the cavity. On top of that, you'll see line items for cavity cutting, which covers the CNC time needed to carve your specific shape, and for polishing or texturing if your part requires a smooth finish or a specific surface feel. Many suppliers also add a setup fee for testing the mold on the press, plus a small charge for spare parts like ejector pins or springs. Knowing these components ahead of time helps you compare quotes fairly, because a low base price can hide higher fees later.
First-time buyers often overlook the cost of revisions. Once the mold is cut, any change to the part design—even a small dimensional tweak—means re-machining the steel, which can easily add 10 to 20 percent to the original quote. That's why experienced buyers freeze their design early and only request changes after the first sample run if absolutely necessary. Some shops include one round of minor adjustments in the base fee, but many do not, so ask before you sign. Also pay attention to material hardness: a mold cut from P20 steel costs less upfront than one from H13, but if you're running abrasive or high-volume production, the cheaper steel may wear out faster and cost more over the life of the project.
Finally, watch out for hidden line items like shipping, crating, and documentation. A custom mold is heavy and fragile, so secure packaging isn't free—it can range from a few hundred to over a thousand dollars depending on size and destination. Some suppliers also charge for CAD file optimization or for a digital mold-flow analysis, even though these are often bundled into the initial quote. To avoid surprises, request a written breakdown of every fee before paying a deposit. A transparent shop will list the cavity cost, base cost, setup, polishing, and packing separately, making it easy for you to understand exactly what you're paying for—and to negotiate if something seems inflated.
Designing Artwork That Translates Well into Silicone Depth
When creating artwork for silicone depth, think of your design as a layered terrain rather than a flat illustration. Silicone picks up subtle variations in height, so even a slight gradient in your digital canvas can translate into a tactile ripple. Avoid relying on faint outlines or delicate hairlines; they often vanish once molded. Instead, use bold, chunky shapes with clear separation between elements. If a detail is too thin or too close to another, the silicone may fill the gap and merge them into a single blob.
Contrast is your best friend here. High contrast between raised and recessed areas gives the final piece that satisfying, touchable quality. Think about depth as a sliding scale: the deepest points should occupy no more than about a third of your total design area, while mid-level and top-level features carry the visual rhythm. Also, remember that light plays differently on silicone than on paper or screen. A rounded, domed surface catches highlights beautifully, whereas a perfectly flat top can look dull and plasticky. So when you sketch, imagine how each stroke would feel under a fingertip, not just how it looks on a monitor.
Finally, test your design by converting it to grayscale and checking the value distribution. Pure white should represent the highest points, pure black the deepest recesses. If your grayscale looks muddy or too uniform, the molded result will feel flat and lifeless. Aim for a clean histogram with distinct peaks and valleys. And don't be afraid to exaggerate: what seems slightly overdone in your digital file often ends up looking just right once the silicone softens edges and rounds corners. The material naturally tames aggressive geometry, so push your shapes harder than you think you need to.
FAQ
They are raised, rubber-like badges applied with heat and pressure. Unlike flat woven or printed labels, they have a tactile, dimensional surface that catches light and touch. The silicone layer creates depth, making logos and designs stand out on garments and gear.
Properly applied 3D silicone labels handle machine washing, drying, and UV exposure without peeling or fading. The silicone is resistant to abrasion, moisture, and many chemicals. Brands use them on sportswear, workwear, and outdoor equipment precisely because the markings stay legible for years.
Most exporters offer custom shapes, thicknesses, color matching, and surface finishes like matte, glossy, or even glow-in-the-dark. You can also combine silicone with reflective or metallic foils. The key is working with a supplier who can produce precise molds without losing fine details.
They bond well to cotton, polyester, nylon, blends, and many coated or laminated textiles. You'll see them on t-shirts, hoodies, bags, caps, shoes, and neoprene items. For hard surfaces, a different adhesive or mechanical attachment is usually needed.
Look for real production experience, transparent lead times, and samples with consistent edge finish and adhesion strength. Ask about mold fees, minimum order quantities, and whether they can handle multi-color or multi-layer silicone. A reliable exporter will also provide test reports for wash resistance and restricted substances.
The label is placed on the fabric and pressed with a heat press at a set temperature, pressure, and dwell time. Many smaller brands use a standard flat heat press successfully, but consistent results require following the exporter's recommended settings. For complex curved areas, silicone pads or specialized fixtures help.
Yes. Poor edge sealing can cause lifting after washing. Uneven thickness makes the label feel cheap and can affect adhesion. Some low-quality silicone yellows over time or picks up dye from dark fabrics. Always request pre-production samples and test them on your actual fabric.
Unit costs are often higher than basic printed labels but lower than dense embroidery or molded rubber patches with sewing. The initial mold fee can be significant, but that cost spreads across large order volumes. For premium branding that lasts, many brands find the per-unit investment worthwhile.
Conclusion
When choosing a 3D silicone heat transfer label exporter, the real test is not how the sample looks on day one but how it performs after dozens of industrial wash cycles. The survival secret lies in the silicone's cross-linking density, the precision of the heat-activated adhesive, and the way raised elements are built up in layers rather than pressed flat. A label with a tall, rounded dome may feel premium, but if the exporter cannot control the durometer and edge cure, that dome will crack or peel under high-temperature detergents. Matching the exporter's texture capabilities to your brand's needs means asking for physical swatches with different surface finishes—matte, gloss, pebbled, or raised lettering—and not just digital renderings. Custom mold fees often confuse first-time buyers, but a clear breakdown of cavity costs, setup charges, and per-unit amortization helps you compare quotes fairly. Cheaper quotes tend to hide costs in thinner silicone layers, lower-grade adhesives, or molds that wear out quickly.
To verify durability claims without visiting the factory, request third-party test reports that follow standard wash protocols—AATCC or ISO methods—and ask the exporter to send a pre-washed reference sample alongside the fresh one. You can also run your own accelerated test at home using a commercial washer and harsh detergent; a trustworthy exporter will welcome that comparison. The hidden costs of low-price silicone label quotes usually appear later as higher rejection rates, inconsistent color batches, or minimum reorder penalties for mold revisions. When designing artwork, think in terms of depth budget: hairline details disappear, small text fills in, and gradients become flat unless the exporter knows how to map grayscale values to silicone thickness. Good depth translation means simplifying negative space, increasing stroke width, and specifying a minimum raised height for legibility. A durable branding solution comes from matching technical know-how with honest pricing, not from chasing the lowest unit cost.
Contact Us
Contact Person: Wang Song Lin
Email: [email protected]
Tel/WhatsApp: +8613751282193
Website: https://www.heat-transferprinting.com/