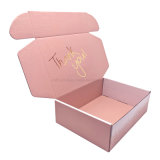
Guide to Making A Red Rosette Gift Box
2024-04-18
Creating a red rosette gift box can add a touch of elegance and sophistication to your presents. Here's a simple guide to making one:
Materials:
- Red gift box
- Red ribbon (preferably satin or grosgrain for a smooth finish)
- Scissors
- Glue or double-sided tape
- Decorative embellishments (optional)
Instructions:
1. Wrap the Box:
- Place your gift inside the red gift box.
- Close the lid securely.
2. Create Rosettes:
- Cut several lengths of red ribbon, each about 6-8 inches long, depending on how large you want your rosettes to be.
- Fold one end of the ribbon over to create a small loop, then twist the ribbon and continue to fold it over itself in a circular motion, forming a rosette shape.
- Secure the end of the ribbon with glue or double-sided tape to hold the rosette in place.
- Repeat this process to create multiple rosettes of varying sizes, depending on your preference and the size of your gift box.
3. Attach Rosettes to the Box:
- Use glue or double-sided tape to attach the rosettes to the top of the gift box. Arrange them in a pleasing pattern, layering larger rosettes at the bottom and smaller ones on top for dimension.
- You can also add decorative embellishments such as faux pearls, rhinestones, or small ornaments to the center of each rosette for extra sparkle and flair.
4. Final Touches:
- Once all the rosettes are securely attached, give the gift box a final check to ensure everything is in place and secure.
- If desired, you can add a coordinating ribbon around the sides of the box for a polished finish.
5. Presentation:
- Display your beautifully decorated red rosette gift box under the tree or present it to your recipient with pride.
Creating a red rosette gift box is a simple yet effective way to add a touch of sophistication and style to your presents. Experiment with different ribbon textures and embellishments to customize your design and make each gift box unique.


